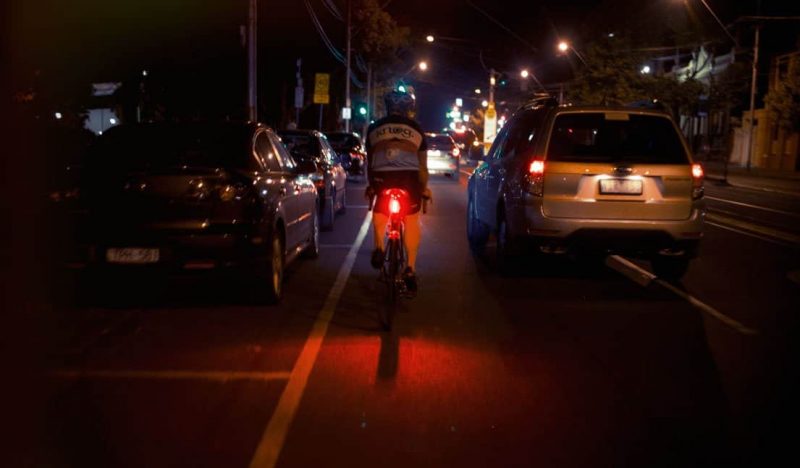
I’ve seen many people make this mistake during their buying process. They go for the one with the highest lumens rating that they can afford.
While this might be the safer option to go with, it’s not always the right option and by knowing how lumens work, you might even save some money.
A higher lumens count doesn’t necessarily mean a brighter light.
99% of manufacturers today specify the brightness in terms of Lumens, except maybe for a German company, Busch & Muller. While there is nothing wrong with using Lumens, there is another way to do it, which is better but less talked about.
Let me introduce you to the term Lux.
What is Lux?
What’s a Lux and why is it a better interpretation of the brightness?
Imagine the car salesperson telling you that the gas tank of the car you’re buying is 20 gallons. Would you know how far 20 gallons will last you?
It depends on several factors, like the engine capacity right?
Lux is the measure of a light’s intensity and it affects what you see.
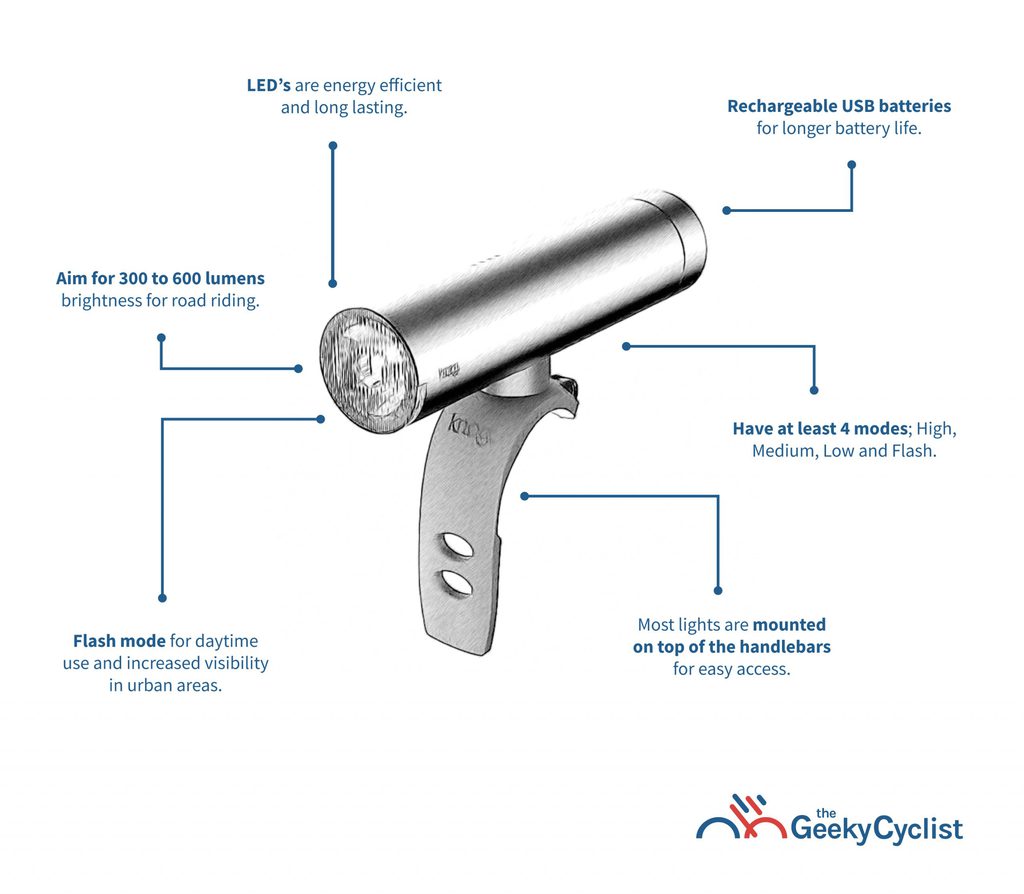
- Lumens : The unit used to represent the amount of light, aka brightness emitted by a single source.
- Lux : The unit used to measure the amount of light in a specific area, a certain distance from the source. In other words, it’s a measure of the light’s intensity.
- Beam Angle : The coverage of the light beam in front of you. A higher beam angle results in a diffused beam pattern (lower lux), while a lower beam angle results in a focused beam pattern (higher lux). A beam angle of around 20 to 30º is what you should be looking for.
Geek Tip : You don’t need lights with the HIGHEST lumens rating.
You can still find bike lights using disposable AAA batteries today in the market.
For a longer battery life and durability, I’d recommend going with USB rechargeable batteries. Most USB rechargeable lights either use the Lithium-Ion (Li-Ion) or Lithium Polymer (Li-Pro) batteries today as they are lighter, smaller, and have much more capacity.
You’ll be provided with a micro USB out from the box when you purchase.
There were major advancement made in lithium batteries in the past 5 years so it’s just not worth the effort to keep replacing batteries, especially if you use the bike lights on a daily basis.
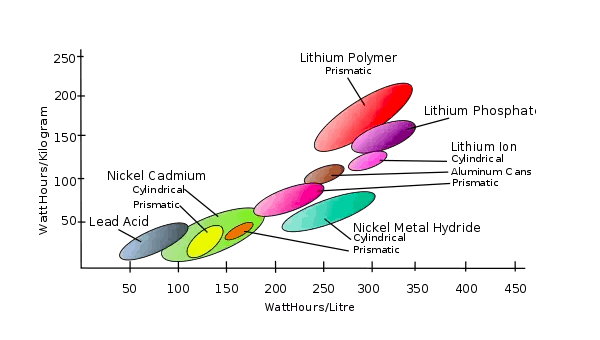
The chart above shows why Lithium-based batteries are preferred, especially for small electronic devices.
- For the same weight, Lithium-based batteries hold more charge.
- For the same volume, Lithium-based batteries hold more charge.
Battery size, capacity, and life are relatively proportional. Longer battery life would require a larger battery capacity and hence a larger size.
That’s the reason why lights with above 1000 lumens come with a separate rechargeable battery pack. Another reason is to avoid the battery pack overheating the entire light body.
What’s considered a good battery life?
Some lights like the Cygolite Expilion 850 takes things up a notch with a user-replaceable rechargeable battery. With this, you can have the option of carrying a spare rechargeable battery if you forgot to charge.
Geek Tip : You don’t need a bike light with the most number of light modes.
With most bicycle lights today, the 2 most popular mounting options are using straps mounts, and clamp mounts.
When it comes to mounting locations, there are various options available, depending on the design of the light.
On Top of the Handlebars
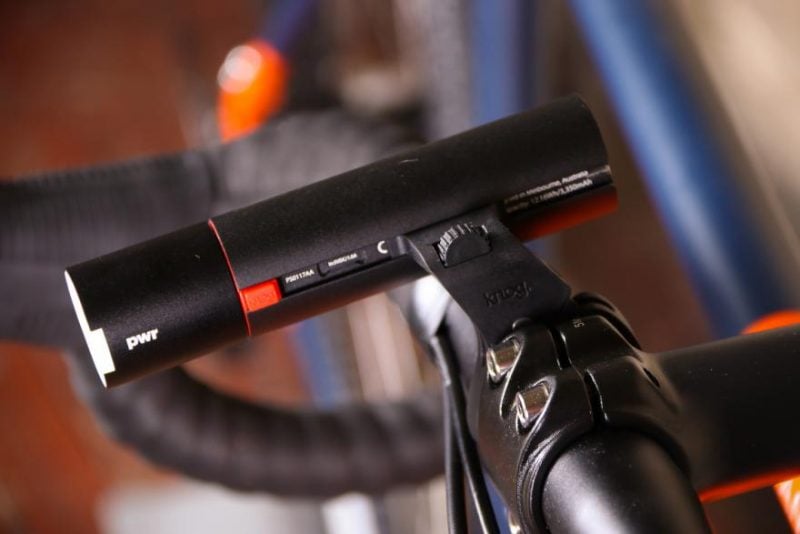
Most bicycle lights such as the Knog PWR Road and Light and Motion Seca are designed to be mounted on top of the handlebars as it’s the most straightforward way.
- Pros : Easy access to the buttons, to adjust the tilt, and to tighten the straps
- Cons : Crammed cockpit, especially on narrower handlebars below 40 cm wide
Below the Bike Computer Unit
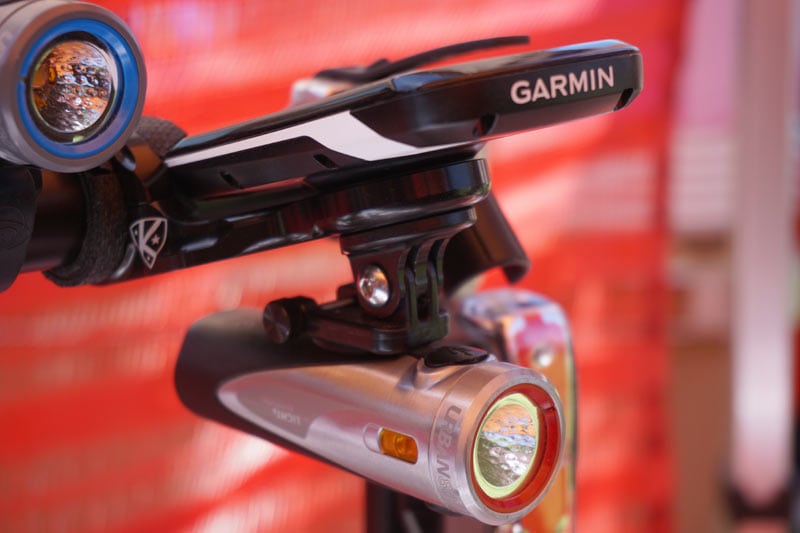
Some newer lights like the Exposure Lights Trace are designed to be mounted on both the handlebars and below your cycling computer with a separate quick-release mounting kit.
It certainly looks better with this but it does come with a downside; it’s harder to access the light and buttons while riding.
- Pros : Very clean cockpit look as the light is out of your sight
- Cons : Buttons are not that easily accessible while you’re riding
Read More : Wahoo Elemnt vs Bolt vs Roam – The Differences Explained
In Front of the Handlebars
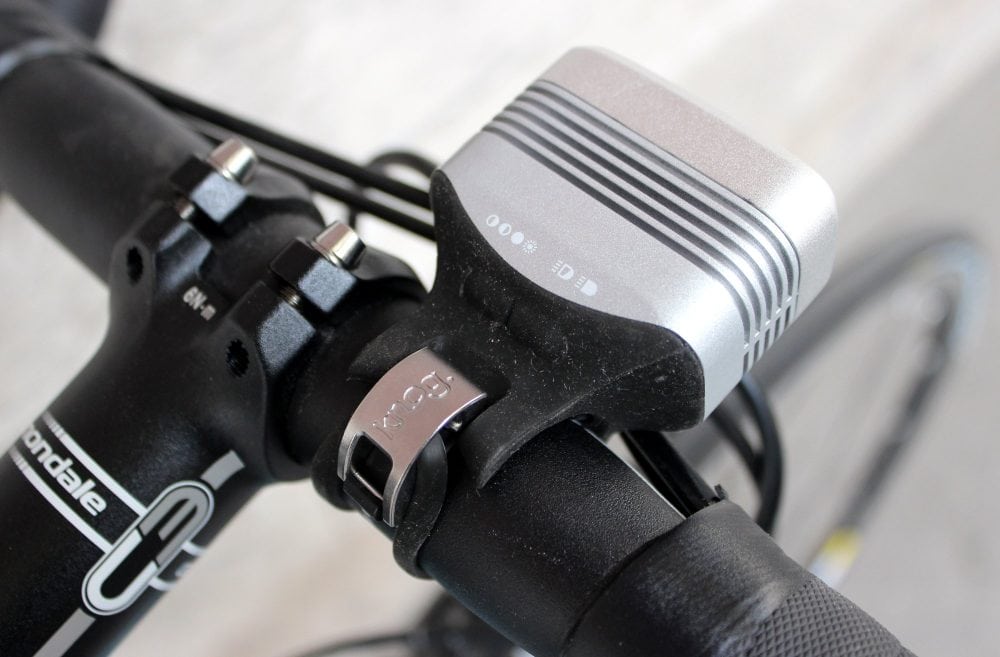
Knog came up with a creative way of mounting the light which gives you the best of both worlds. One such example is the Knog Blinder Road.
- Pros : Clean cockpit look
- Cons : Handlebars might be a little cramped if you’re using a narrow one below 40cm